Official Luthiers Forum!
http://www-.luthiersforum.com/forum/

Neck angle please
http://www-.luthiersforum.com/forum/viewtopic.php?f=10102&t=4591
Page 1 of 1

Author:  Serge Poirier [ Tue Jan 17, 2006 4:49 pm ]
Post subject: 

Hi all, i've noticed on some guitar plan that i have that there is a slight angle at the neck, that in this case is 88.5 degrees.

My question is, if not too silly, do you guys build the head block of the soundbox with that angle transfered into the neck pocket of the head block or do you build the head block at 90 degrees and build the 88.5 degrees on the heel all together or just the part of the heel that sits in the pocket of the head block ?
Kinda gets the frenchie confused and hope it's not too much of a bother?


whew, that was a lot of translating for my frenglish brains man! Thank you all in advance !

The frenchie rookie

Author:  Andy Zimmerman [ Tue Jan 17, 2006 5:01 pm ]
Post subject: 

Well you have opened pandoras box with this one.
I build my head block with the angle the keeps the neck and body
completely straight and in alignment. What that angle depends on the body
size, doming of the top etc. I want the angle that allows the height above
the bridge to be exactly correct, with keeping the neck angle and body in
complete alignment. No change at the neck body joint (14th fret)
For my OM 14 fret 24.9 scale with a 25 domed top, flat braces above the
sound hole, my neck block is at 91.5 degrees with the neck around 88.5.

Make sense????

Andy

Author:  crazymanmichael [ Tue Jan 17, 2006 6:07 pm ]
Post subject: 

i set the neck block and its mortice at 90 degrees and cut the tenon cheeks so that the neck sits at a slicght angle below the plane of the top. i attempt to build so that this angle is about 1.5 degrees below the horizontal, or 88.5 degreees angle between the fb gluing surface and the cheeks of the heel.

Author:  ggdelazzer [ Tue Jan 17, 2006 7:57 pm ]
Post subject: 

I do exactly the same Michael does and cut this angle with a tablesaw. I do prefer a 1.5 deg on steel string and 1.0 in classicals; this seems to me better matching with the different string tension and top arching. Not too experienced with classicals indeed.

Am I right?

Luigi

Author:  Serge Poirier [ Tue Jan 17, 2006 11:04 pm ]
Post subject: 

Thanks a lot Andy, Michael an Luigi!

It does get more clearer in my head, but at the same time i translate, i have a bit of difficulty visualizing all of this , could any of you or others put a simple drawing kind of where to make the cuts and on what plane so that i get completely out of the fog or forward me to such drawings please?

I just want to make sure that this question is 100% clear cuz my previous neck was a total fiasco and i'm a bit scared for no 2!

Thanks

Serge

Author:  TonyKarol [ Tue Jan 17, 2006 11:51 pm ]
Post subject: 

I dont worry at all about what the angle is - glue the block in at 90 degrees, and then when the top is bowled to 28 ft radius it takes on 'an angle', whatever it may be. The fact of the matter is the 28 ft bowl gives the top is curve and sets the angle for the neck. I sand the area under the fretboard of the top flat, I do not flatten the upper transverse, and I set the neck such that the FB extension sits flat on the top. My bridges all come out around 5/16 thick, which is perfect for me. I use a sliding bevel top transfer the angel from the body to the table saw to cut the neck heel. I cut it slightly less than required, so that the pull sanding to fit the heel will bring the neck angle back as you do that. Even on a students guitar where the back caused the blcok to tilt a bit because we didnt put in one of hte spreaders, the neck angle was just different - the FB ext was still set to sit flat on the top, and the bridge again is about 5/16s.

I find its not the relation of the side to top angle at the heel, but the curve of the top that is really more important. Tjis may not be true for those using different bowl radii, or half radiused half flat tops.

Author:  Mike Mahar [ Tue Jan 17, 2006 11:53 pm ]
Post subject: 

This is how my neck join turns out. I use screw-in inserts to attach the neck. The screwe insert are drilled perpendicular to the side of the guitar. The tenon on the neck a bit shorter than the mortice so I don't bother to make the end of the tenon parallel to the mortice. The bolt holes in the head block are slightly oversize so that I can fine tune the fit when I set the neck. I get a degree of freedom that way. The whole thing is stable because the cheeks of the heel are pressed tightly agains the side of the body. If the bolts loosen, then the neck could slide around a bit, but the bolts don't loosen and, when the fretboard is glued to the top, there is even less tendency to move around.

The top and bottom of the head block are angled to reflect the dome of the top and back. The angle here is different for the top and bottom because the dome is different.

I make the neck completely seperately from the body and only attach them after the finish is on. That includes fretting. To keep the fretboard extension from bending, I bolt on a block of wood to the neck to support the extension. This allows me to level and dress the frets while not attached to the body.

The angles in the illustration are exagerated.

Mike Mahar38735.3366898148

Author:  Kevin Gallagher [ Wed Jan 18, 2006 12:36 am ]
Post subject: 

Serge,
   If you plan on working your top to a radius such as 25 feet or so, the angle provided at the neck block will allow for a good fit if you cut the cheeks of the heel that will contact the body at the neck joint to 1.5 degrees or close to it. This is a fairly common neck angle and allows for the radius of the top to present the bridge and saddle height necessary to meet the approach of the neck with the height of the fingerboard.

Regards,
Kevin Gallagher/Omega Guitars

Author:  Serge Poirier [ Wed Jan 18, 2006 5:24 am ]
Post subject: 

Thanks Tony, Mike and Kevin! Wow, you guys are awesome, it's all clear now! And those posts are saved.

Tony, i'll run to the store and get me a sliding bevel to transfer my angles.

Mike, your drawing helped very much as long with your explanations

And Kevin, i'll be using the 25 feet radius so i can get that 1.5 degree or If i use a 14 fret at the body neck , would you still recommend me to use 25 feet radius or 28 feet ?

You guys are great!    

Author:  Michael Dale Payne [ Wed Jan 18, 2006 6:08 am ]
Post subject: 

Serge, get a good one. Many of the cheap roofer's type bevels are not accurate.

Author:  Serge Poirier [ Wed Jan 18, 2006 7:42 am ]
Post subject: 

Got the message Michael! Thanks

Serge

Author:  TonyKarol [ Wed Jan 18, 2006 8:35 am ]
Post subject: 

I have the japanese made Shinawa I think it is from Lee Valley - aluminum body and steel blade, it has a triangle loop on the large end which threads in and locks the blade snug, and then stays out of the way no matter how you use it.

Author:  Alan Carruth [ Wed Jan 18, 2006 9:07 am ]
Post subject: 

What counts is the projection of the neck or fingerboard surface at the bridge, which sets the bridge height. The angle that makes that come out right is not important in itself, IMO. When you're making by hand there are lots of things that can change that angle, and you just have to fit it on every guitar.

Assuming that you use a 6mm thick fingerboard, and that it's not glued to the neck when you cut the joint, it's easiest to go by the projection of the surface of the neck itself, sans fingerboard, at the bridge location. I go for a projection that is .5mm above the top.

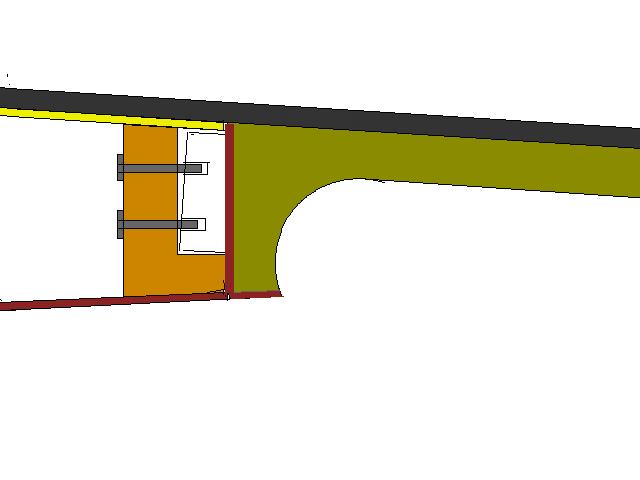
In my case, I like to glue a wedge under the fingerboard extension rather than trim off the underside of the fingerboard, so that makes the neck end a little 'proud' of the top when everything is fitted correctly.

Fit the shoulder of the tenon, the end of the neck, first, with the dovetail or whatever oversize, so that the neck end sits 'proud' of the top. Trim the surface where the neck hits the side until the centerlines line up and the projection is .5mm higher at the bridge than at the edge of the top, or, as I do it, the upper edge of the soundhole. Then just 'walk' the dovetail down. This way you're only working on one adjustment at a time, which is about all my old brain can keep track of.

Author:  Steve Saville [ Wed Jan 18, 2006 11:00 am ]
Post subject: 

Don't you guys put a 1.5 degree angle on the top of the upper bout to match the neck angle? If you don't isn't there a gap?

Author:  Andy Zimmerman [ Wed Jan 18, 2006 11:16 am ]
Post subject: 

We sort of discussed this earlier this week.
The key is to build the body of the guitar correctly so that the plane of the
upper bout allows for the correct height at the bridge location once the
fretboard is added etc   THEN make sure your neck angle matches this so
there is no change at the neck body junction.

Build the correct body and then make your neck fit the body....NOT the other
way around

Andy

Author:  Serge Poirier [ Wed Jan 18, 2006 3:25 pm ]
Post subject: 

Thanks Andy because before asking my question, i was so puzzled, that i could have went and built my neck before the box just to make sure it would fit my head block in there! Thank God you guys are here!

Serge

Page 1 of 1 All times are UTC - 5 hours
Powered by phpBB® Forum Software © phpBB Group
http://www.phpbb.com/